


TOPIC 2: INTRODUCTION TO LABORATORY PRACTICE
A Laboratory is a room or a building designed specifically for carrying out experiments.
Laboratory Rules and Safety Guidelines
Rules in a Physics Laboratory
State rules in physics laboratory
While working in the lab, individuals are advised to adhere to specific lab rules to ensure their safety, that of other people working in the lab and the safety of the apparatus and chemicals stored in the lab.
Rules in the physics lab
- You should only enter the lab in the presence of a lab attendant.
- Keep all exits and entrances to and from the lab clear of obstructions.
- Don’t eat or drink in the lab.
- Solid objects should not be thrown into the sink or water ways.
- Don’t use any lab container for drinking or storing food.
- Make sure that you wash your hands with soap before you leave the lab.
- The cover or stopper of a particular chemical must be replaced immediately after use.
- After experiments, clean your bench and leave it dry and well arranged.
- Never quarrel or fight in the lab.
- Never use ungloved hands to hold hot objects
Safety Measures in the Physics Laboratory
Explain the safety measures in physics laboratory
Safety measures in physics lab
- All experiments which produce poisonous fumes must be conducted in the fume chamber.
- Lab floor should not be polished to avoid slipperiness.
- Lab should have large windows and doors should be opened outwards.
- Ensure that the fire extinguisher is fixed to an appropriate place ready to be accessed in case of fire.
- In a multi storey building, a physics lab should be in the lowest floor.
Using First Aid Kit to Render First Aid
Use the First Aid Kit to render first aid
First aid is the immediate care given to accident victims or an injured person before he/she is taken to the hospital for further medical treatment. It reduces pain and it helps to bring hope and encouragement to accident victims.
A First Aid Kit is a small box which is placed in a safe and accessible place in the lab and is used for the storage of instruments and chemicals for first aid.
Contents of a first aid kit and their uses
| Contents | Uses |
| 1. Pair of scissors | To cut adhesive tapes, bandages and gauze |
| 2. Rolls of adhesive tape | To hold firmly into wounds bandages, gauze and cotton wool |
| 3. Bandages and cotton wool | To clean and cover wounds |
| 4. Sterilised new razor blades | Used when treating new or old wound |
| 5. Sterilised wound | To clean and cover wounds |
| 6. Safety pin | To tighten clip bandages |
| 7. One jar of petroleum jelly | To apply on burns |
| 8. Iodine tincture | To clean fresh cuts and bruises |
| 9. Soap | To wash hands and wounds |
| 10. Antibiotic solution. | To clean wounds |
Warning Signs
Identify warning signs
Warning signs are signs on the containers of chemicals as warnings about the danger of the contained chemical. There are six warning signs.
Explosives
These are substances can explode. An explosion is a forceful rapid reaction which involves the throwing off particles at high speeds.
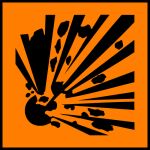
The sign means that it is dangerous to keep explosives in glass containers.
Oxidant
This is a chemical/substance that helps a burning substance to burn faster.
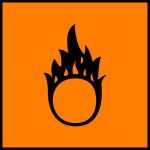
Oxidising agent makes a small fire to become bigger. Heating a mixture of an organic material with an oxidising agent may cause explosion. Eg; heating potassium permanganate with saw dust.
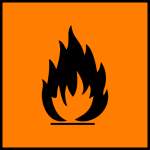
Flammable
These substances catch fire easily. They should not be kept near open flames. If heated, an electric heater should be used.
Corrosive
These substances burn skin as well can corrode floors and desktops.
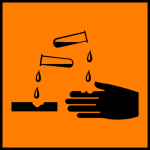
If by accident, a corrosive substance comes into contact with your skin, go to the sink and wash your skin with a lot of water. Examples; Concentrated mineral acids like HCl and HNO3 II. Concentrated alkalis like NaOH and KOH
Toxic
These are very poisonous and can cause death immediately after use or after a few days. They should not be allowed to come into contact with you.
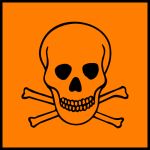
If you come into contact with such a chemical accidentally, wash it away with a lot of water.
Harmful/irritant
Harmful are substances that may cause illness or endanger your health. They won’t kill instantly but they are lethal. Irritating substances- cause pain in eyes or on your skin and can endanger your health if you are in contact with them doe too long.
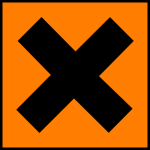
They should be handled according to the stipulated instructions.
Warning Signs in Daily Life
Use warning signs in daily life
Warning signs help us to know the possible danger that is near us so that we can take precautions before it is too late. For example, in hospitals there are doors labeled with radioactive symbols to warn the passers of the harmful radiations from x-ray machines. These symbols can also be seen in mining areas.
The boxes containing materials like glasses which can easily break are labeled with fragile warning sign to make anyone who carries box to be careful. Warning signs can be found on several materials to make sure safety is observed.
Basic Principles of Science Investigation