


TOPIC 3: HEAT SOURCES AND FLAMES
Heat sources
Most chemical reactions require heat to proceed. It is therefore important to have sources of heat in a laboratory for heating various reacting substances. Sources of heat in a chemistry laboratory may include Bunsen burner, candle, spirit burner, kerosene burner (stove), tin lamp (kibatari) and charcoal burner. These are burners commonly used in most school laboratories.
Different Heat Sources which can be Used in a Chemistry Laboratory
Name different heat sources which can be used in a chemistry laboratory
The Bunsen burner is the best of all burners because it is convenient to handle. Another advantage of the Bunsen burner is that it produces a hot flame whose temperature is approximately 1000°C. The temperature can be adjusted easily to produce a non-luminous flame, which does not produce much soot.
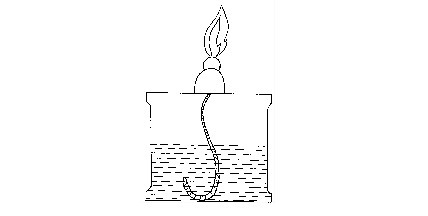
Spirit burner
The spirit burner can also produce a soot-free flame. But the flame is not hot enough to effect (produce) some chemical reactions. Apart from that, the burner is filled with spirit, a substance that is highly flammable.
Spirit lamp
A candle
A candle can only be used where a chemical reaction does not require much heat. Its disadvantage is that it produces a lot of soot. The other burners, though not commonly used, are an electric heater and a gas burner.
The electric heater uses electricity. The gas burner uses a liquefied gas. The disadvantage of an electric burner is that it cannot be used in rural areas where there is no electricity.
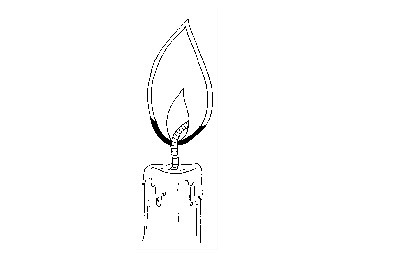
Candle
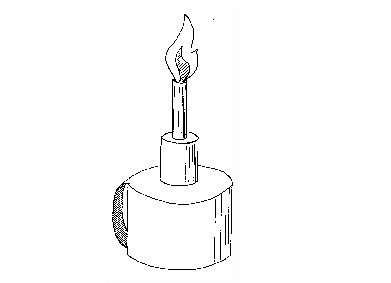
A kerosene burner
A kerosene burner (stove), also called jiko la mchina in Swahili, if well adjusted can produce a flame hot enough to heat many substances in the laboratory. It is fulled with kerosene, a fuel that is convenient to carry and store. This fuel does not catch fire easily as compared to spirit and it is affordable
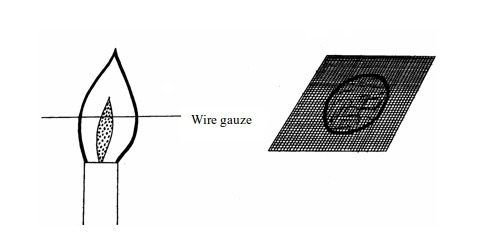
It can conveniently be used by schools in the most remote areas where there is no electricity. If too much heating is required, wire gauze should be placed on top of the burner. This will enable reduce soot and increase the heating temperatures to about 1000°C or more.

Kerosene burner (stove)
A charcoal burner
A charcoal burner can also be used in remove areas. In case the kerosene burner is not available, for one reason or another, a charcoal burner can be the best alternative.
The red-hot charcoal on the burner is almost soot-free. It can produce high temperature sufficient to carry out many reactions.

Charcoal burner
A tin lamp
A tin lamp (kibatari), though it produces a lot of soot, can also be used as a burner in a laboratory, especially in remote areas.
However, the heat it produces is not hot enough to initiate some reactions.
Tin lamp
The Functioning of a Bunsen Burner
Explain the functioning of a bunsen burner
Of all the burners we have discussed so far, a Bunsen burner is the mostly used. Therefore, we are going to discuss about the functioning of the Bunsen burner in more detail. As the name suggests, this burner was invented by a German scientist called Robert Bunsen, so it was named after his name as a Bunsen burner. The burner uses coal gas, which burns with a hot and non-luminous flame when the air holes are open. This is a kind of flame we normally use in the laboratory.
Functions of different parts of the Bunsen burner
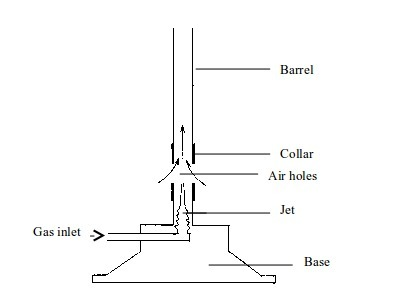
Base: Supports the burner. It makes the burner stable, due to its heavy weight, when placed on a bench.
Gas inlet: Lets the gas in from the gas supply.
Jet: Directs the gas to the barrel
Collar: Regulates the amount of air entering the burner. It has air holes that can be turned open or closed depending on the kind of flame, and hence amount of heating required.
Air holes: These small holes on the collar allow air to enter in the burner.
Barrel: This is a part of the burner where air (from outside), and gas (from gas supply) mix up and burn.
How to light a Bunsen burner
After knowing the different parts of the Bunsen burner, it is important that you also learn how to light it. This is because careless use of the burner may lead to accident or wastage of the gas. The following is a correct sequence of steps on how to light the Bunsen burner:
- Connect the Bunsen burner by a rubber tube to the gas supply.
- Close the air holes.
- Turn the gas tap on to let in sufficient gas.
- Quickly bring a flame at the top of the barrel. You may use a matchstick, a lighter or wooden splint as a source of flame.
- Turn the collar to adjust the air holes until you get the type of flame you want. You may have the holes completely open.
- Adjust the gas tap until the gas supply is enough to produce a non-luminous flame.
To put off the flame of the burner after you finish heating a substance, turn the gas tap off in order to cut off the gas supply to the burner. Disconnect the burner from the gas mains by removing the rubber tube connecting the two. Then close the air holes. Pay attention not to touch the hot collar with your fingers or else wait until it is cool enough. Take the Bunsen burner and keep it at the appropriate place
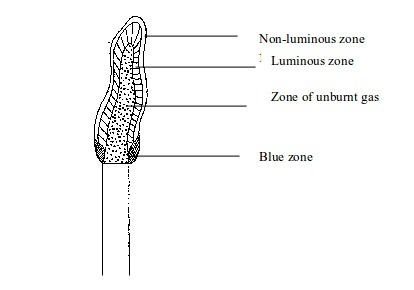
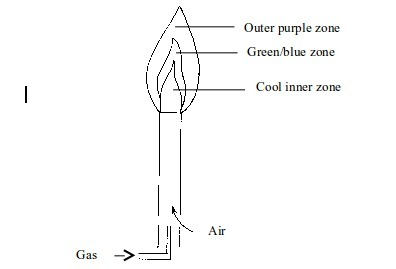
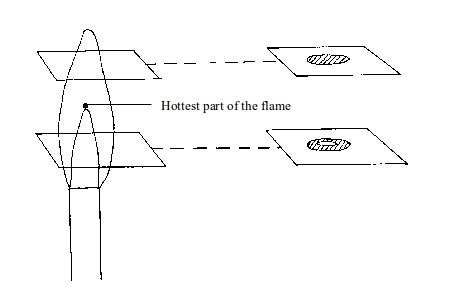
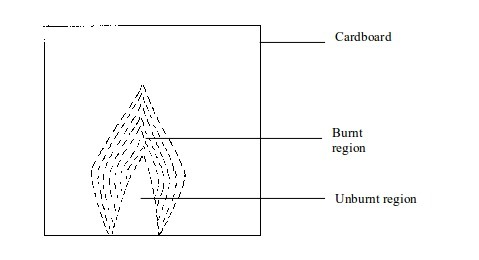
Types of flame
1 Comment
Good